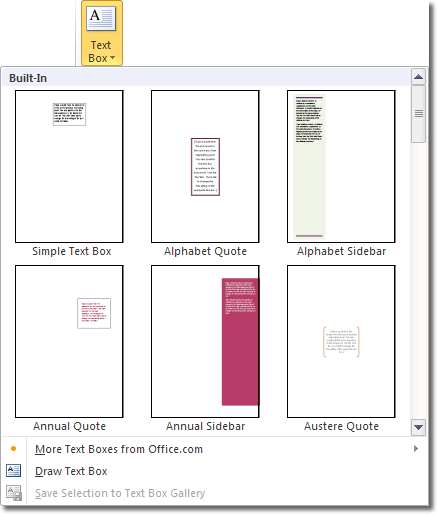
A text box is an object that you can add to your Word document to emphasize or set off your text. To add a text box, click Insert > Text > Text Box. A panel opens that displays a selection of text box types for you to choose from.

Click on the text box type you'd like to insert. The text box is added to the page and it contains placeholder text for you to replace with your own. Because all the text is selected, as soon as you start typing, what you type will replace the placeholder text. Here is a simple text box that I inserted:

Adjusting The Text Box
While the text box is selected, you'll notice that there are drag handles at each corner of the box and along each edge. You can drag those to resize the box. As you resize the box, the text adjusts to fit the new dimensions. When you hover the mouse over the boundaries of the box, the cursor changes to a double arrowed shape - when it does this, you are able to click and drag to move the box around your document.
You can also rotate the text box by clicking and dragging on the green rotation handle at the top. Dragging left rotates the box in an anticlockwise direction whereas dragging right rotates clockwise.
Styling Your Text Box
When text boxes are selected, the Drawing Tools contextual tab appears in the ribbon. You can use the commands here to style your text box. Rather than go through all the different commands you can use, let's look at an example and style a simple text box.
Click on the Format tab within the Drawing Tools tab and then click the More button (bottom right) in the Shape Styles group. This is the style I'm going to use:

Now let's add a reflection. With the text box selected, click Shape Effects button in the Shape Styles group. Hover over the Reflection category and select one of the reflections.

This is the finished result!

